Measuring the complete dynamic range with spot metering
When I use the manual or automatic exposure bracketing method, I use almost always the matrix metering to determine the base exposure (see both methods explained in the HDR tutorial part one).
In some cases, we risk not to cover the complete dynamic range of the scene. If I want to make sure to capture the whole 100% of the dynamic range I will measure the scene with spot metering.
Let’s go through the different steps I take to measure the dynamic range of the scene and show how I decide what exposures to shoot to cover this complete range of the scene.
Camera Settings
First I set the ISO and the aperture of my camera for the scene I will be shooting. To determine the complete dynamic range of the scene I am looking for shutter speeds, so I set my camera to Aperture priority (A mode).
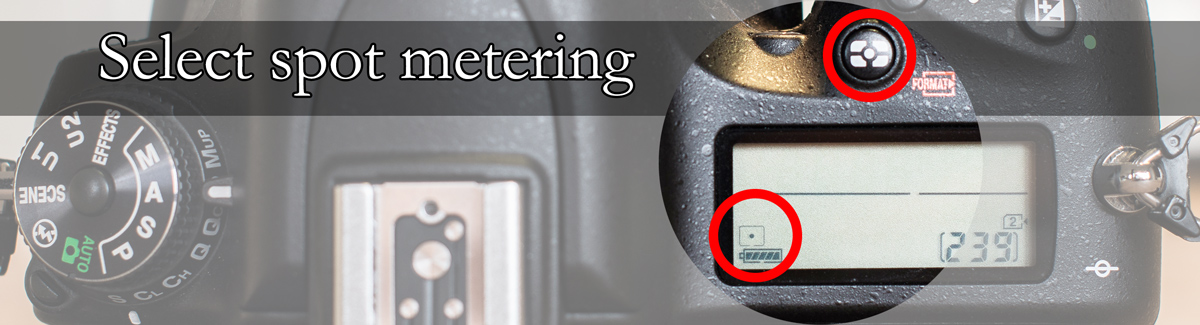
I make sure my camera autofocus (AF) is on and set to single focus point. I set the camera metering to spot metering mode.
Measuring the shutter speeds
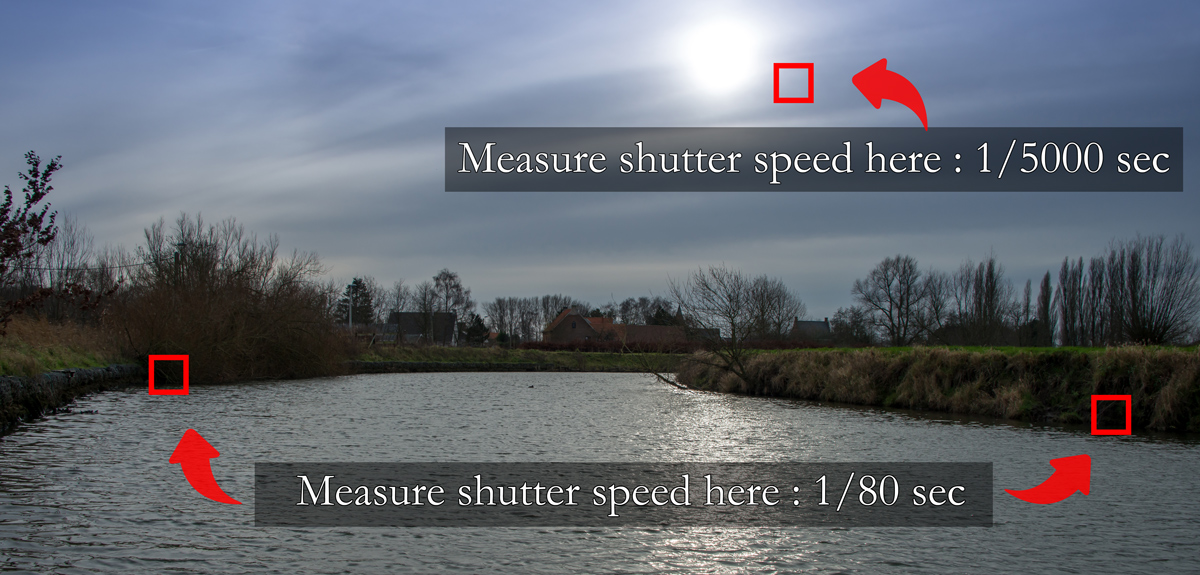
Now, to determine the shortest shutter speed, I will move the focus point to the brightest part of the scene, and I will measure the shutter speed for that point by pressing the shutter half-way down. If there is a sun in the scene, and the sun is the brightest part of the scene, then I will meter slightly to the side of the sun. If you measure for the sun, you will often end up with very high shutter speeds. If the sun is right above the horizon line, this might be acceptable.
I spot meter the brightest part and I will remember the shortest shutter speed of the scene.
Next I will determine the longest shutter speed. To do this I will move the focus point to the darkest part of the scene. I will spot meter the shutter speed for that point, by pressing the shutter half-way down, and I will also remember the longest shutter speed of the scene.
I need to make sure that the shutter speed remains under the longest possible shutter speed of the camera (on most cameras this is 30 seconds). If this is not the case, we cannot cover the whole dynamic range of the scene with the set ISO and aperture. This happens mostly in low-light situations (evening-night). I have two possible solutions to get a slower shutter speed: increase ISO or use a bigger aperture (smaller f-stop) or a combination of both. The aperture, I want to use for the photograph is largely determined by the required depth of field, so after changing the f-stop as far as I possibly (can) want, the only thing I can do next is increasing the ISO. We have to take into account that a higher ISO increases the noise level of the HDR photograph, so we have to be careful with this.
To do the spot metering, it may be necessary to loosen the ball head and move the camera or even to take the camera of the tripod, because sometimes it is impossible to move the focus point on the darkest or brightest part.
Decide what exposures to shoot the scene with and take the shots
Once I know the shortest and longest shutter speed, I can determine how many stops the dynamic range of the scene is. This is quite easy because each doubling or halving of the shutter speed is one stop of light (from 1/16s to 1/8s is one stop).
For example :
slowest shutter speed = 1/80 of a second
fastest shutter speed = 1/5000 of a second
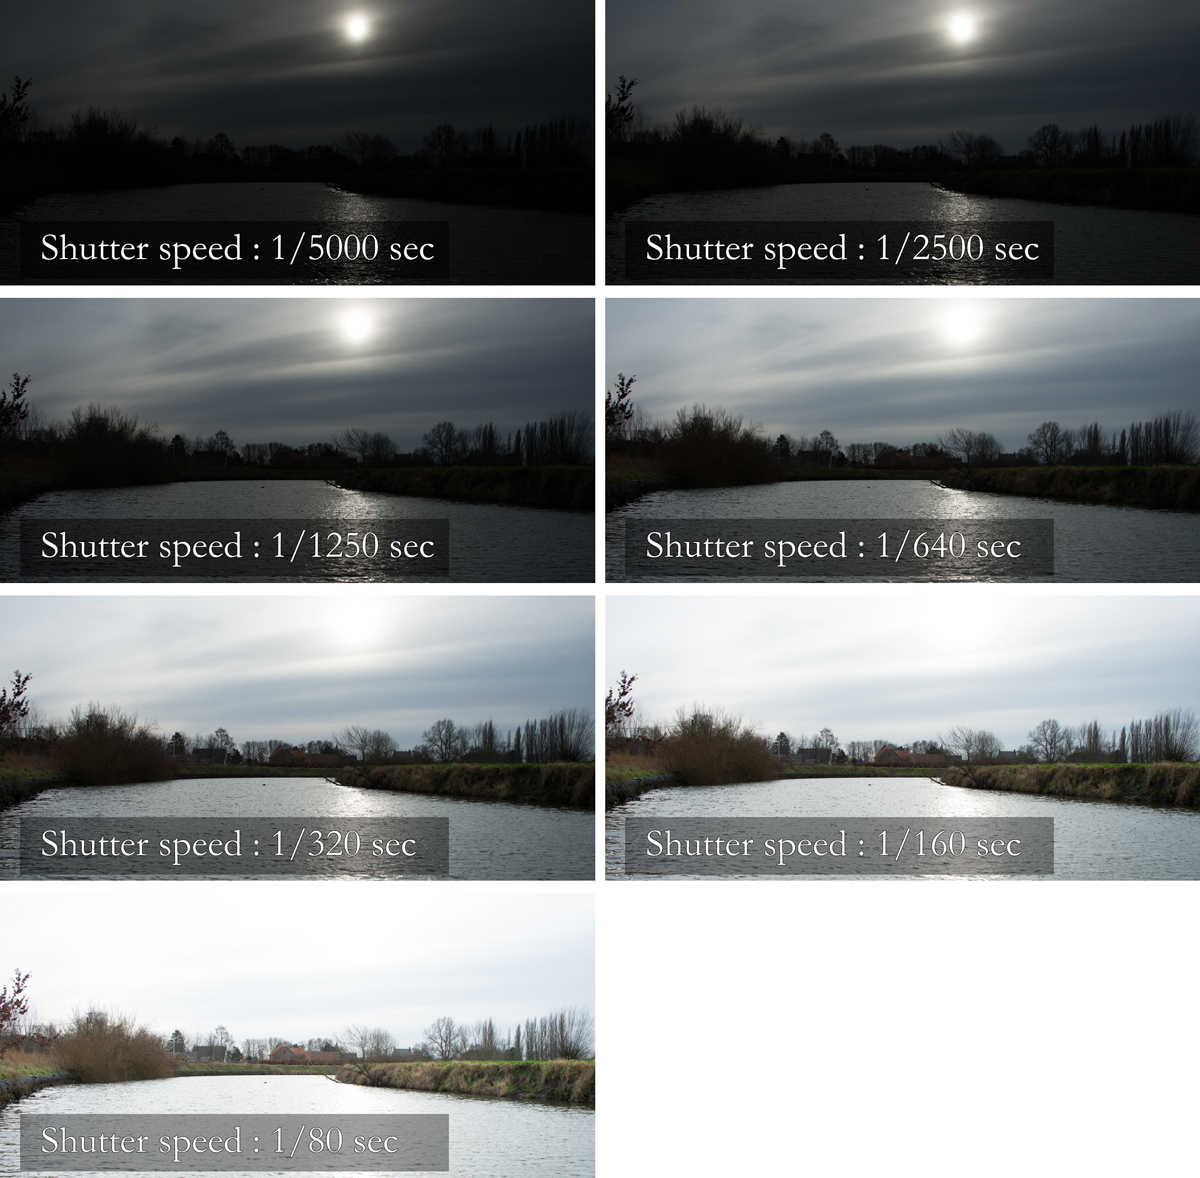
Dynamic range : 1/5000 s – 1/2500 s – 1/1250 s – 1/640 s – 1/320 s – 1/160 s – 1/80 s, a total of 7 different exposures with a difference of one stop of light between each image.
If my camera can handle the number of required exposures in AEB (Auto Exposure Bracketing), I could easily use AEB and shoot the different exposures. But if I have a camera without an AEB mode or a camera that has limited AEB possibilities and cannot handle the number of required exposures, I can shoot the exposures manually.
To do this I put the camera on the tripod, compose the image and set the camera in Manual mode (M). Next I will set the fastest shutter speed and now I can start shooting the exposures. So, I take the first shot. After each shot, I will dial the shutter speed one full stop of light (normally 3 clicks) to double the exposure time, and I will shoot the next exposure. I repeat this until I reach the longest shutter speed required.
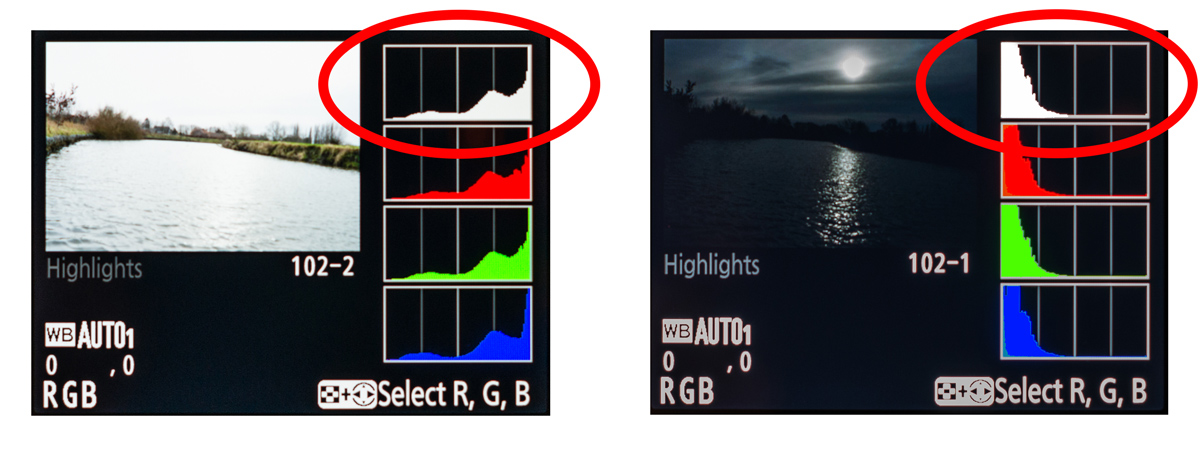
When all the exposures are shot, I will quickly check the histograms of the longest exposure and the shortest exposure to see that I have captured each end of the range of the scene. If I see one or either end of the spectrum is still ‘clipped’ and thus not captured, I can quickly add an exposure or two to get all the exposures I need.
The only thing left to watch out for is to repeat your spot metering, when the lighting situation changes. This especially happens when shooting sunrise or sunset, golden hour and blue hour.
I always shoot the exposures from darkest to brightest, so I start with the highest shutter speed (darkest exposure) and work my way down stop by stop to the slowest shutter speed until I have taken all the required exposures (this way my photographs are ordered from darkest to brightest). This facilitates to better group the photographs while scrolling through the results
Some of the newest cameras such as my NIKON D750 allow up to 9 exposures AEB, which covers usually the whole dynamic range. Using AEB helps to prevent camera shake, even on a tripod, as moving a dial and pressing the shutter each time can still cause some movement. The possible techniques I apply to prevent camera movement are discussed in another blogpost.
Try this technique and share your experiences with us. Looking forward to hear from you.
Happy shooting!


